
Calisthenics - Conditioning Without Equiptment
Lack of equipment is no excuse for not training. Anyone, at any fitness level, can train with two things that are available to everyone everywhere: the ground and your body.
Be creative in your application of these movements. Practice them, and incorporate them into workouts. They are an excellent as part of an active warm-up, done in isolation for strength development, or built into metabolic conditioning routines. Specific programming and repetition schemes will vary depending on the fitness levels and goals of trainees.
Push-ups
Push-ups can range in difficulty from very easy to so difficult that few people can do them. Adjusting the difficulty level is simply a matter of changing hand placement and body level to alter leverage and load. Keeping the body upright and the hands in line with the shoulders scales the pushup for people who are just beginning their fitness journey. Placing the feet high and moving the hands lower, toward the hips, increases the loads dramatically and can challenge world-class athletes.
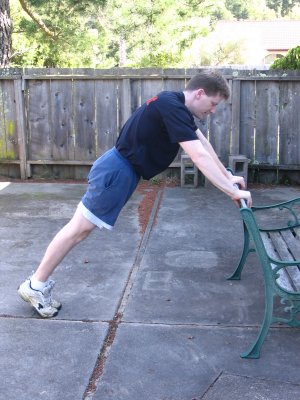
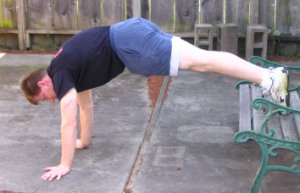
Decline push-up
To do push-ups with little or no resistance, start in a standing position, arms-length from a wall. Extend the arms in front of you at shoulder height to place your hands on the wall slightly wider than shoulder-width. These push-ups (or, more literally, push-outs) are appropriate for beginners and those who are rehabilitating injuries. With the body almost completely vertical, these can be used to restore and build mobility in the arms and shoulders, to teach the plank body position, and to work toward a horizontal push-up on the floor. Even with this simple movement it is important to keep a rigid body and full range of motion (ROM). Each rep should bring the chest and face as close as possible to the wall and finish with the arms completely straight and the shoulders fully extended. The degree of difficulty can be additionally fine tuned by adjusting the distance of the feet from the wall. Obviously, the farther out they are - and the more acute the angle of the body - the more difficult they will be.
Knee push-up
Knee push-ups are another beginning push-up that starts flat on the ground, with the body supported by the hands and the knees (rather than the toes). Again, the body should be kept rigid and full ROM performed, with the knees as the fulcrum of the movement. Be sure to avoid the tendency to pike at the hips and stick out the butt; shoulders hips, and knees should always be aligned.
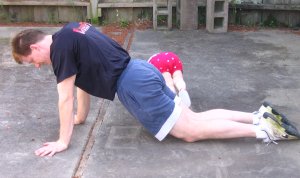
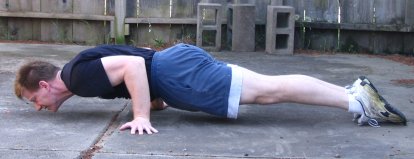
Push-ups
Push-ups should be performed flat on the ground, supported only by the hands and feet. Do not arch the back (swayback) or pike (push your butt up in the air). Each push-up should contact the floor with the chest at the bottom and extend to a high hollow support with straight arms and actively extended shoulders at the top.
Clap push-up
Clapping the hands together at the top of the movement makes push-ups a very dynamic athletic movement. The clap forces you to push aggressively to get your hands off the floor. Adding a chest slap or clapping behind the back will further increase the dynamic requirement.
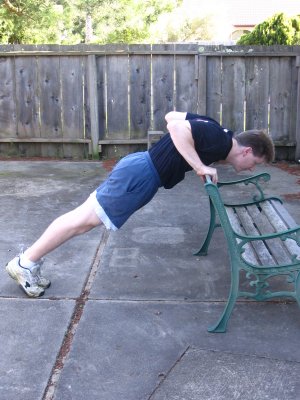
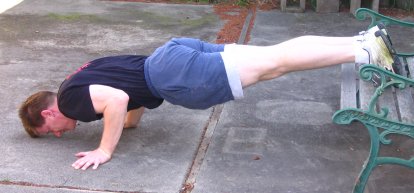
Incline Push-up
Moving the feet onto a raised surface increases the load on the arms. Raising the platform gradually is an excellent way to progress toward handstand push-ups.
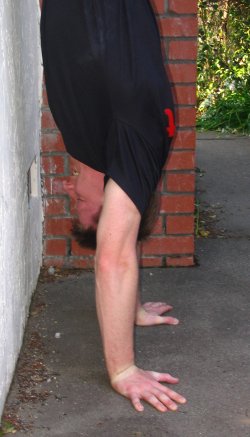
Handstand push-up
The first full bodyweight push-up. An individual should be able to hold a 20-second handstand against a wall with shoulders fully extended before attempting handstand push-ups. You can start with your feet against a wall to remove the balance requirement; practice these both facing the wall and with your back to the wall. Maintain a good straight, tight handstand position at all times. Once you can perform five to ten reps on the wall consistently, begin working them without a wall. Freestanding handstand pushups are an incredibly powerful stimulus, as they require rapid firing of shoulder stabilizers while maintaining a relatively heavy and dynamic load.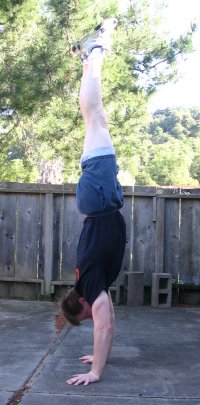
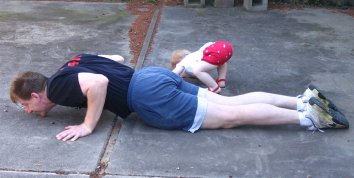
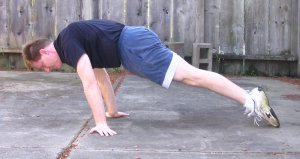
Pseudo planche push-up
Start with a standard push-up, but move the hands farther back under the body toward the hips, which increases the load on the arms. As you get closer to placing your hands directly under your hips, you will notice your feet beginning to slide on the floor. This is an indication that little of your weight is being supported by your feet. Eventually your feet will be able to come completely off the floor - though this will take most people years to accomplish.
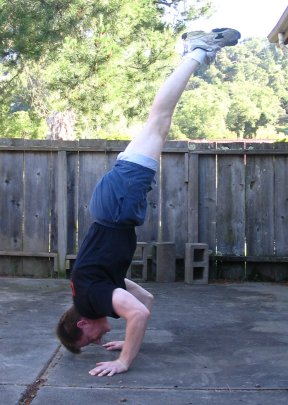
Handstand shoulder shrugs
This is an excellent drill to you learn to activate your shoulders. With a spot or against a wall, get into a handstand. Then, shrug up and down using only your shoulders. Keep your arms completely straight, and try to achieve as much movement as possible in your shoulders.

Core
"Core strength" has become a marketing term for numerous commercial fitness programs. The great majority of these programs, however, are focused on developing a "six-pack," not on developing a strong, functional core, and they are often inadequate even for that goal. Torso strength and stability are crucial for athletic endeavors. Having the ability to keep your midsection tight and to powerfully alter midsection positioning improves your power output and control in almost all functional and athletic movements.
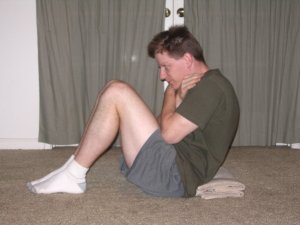
Sit-up
Good old-fashioned sit-ups are an excellent way to strengthen the abs and hip flexors. There is some lack of the functionality in the sit-up movement on totally flat ground, as a flat surface does not allow most people’s abs to properly engage at the beginning of the movement. A rolled-up towel, or one of the commercial products designed for this purpose (such as an AbMat) can be placed under the lower back to avoid this limitation.
Sit-ups can be done with the feet anchored or not. Having the feet anchored generally increases the rate at which sit-ups can be performed, which intensifies the metabolic demand but also shifts the recruitment more to the hip flexors. To take the hip flexors out of the movement and require the abs to do the work, put the soles of your feet together, with knees splayed out to the sides, an AbMat or similar support under your lower back, and roll smoothly up into a fully upright sitting position, with no jerking in the motion.
To change the load on sit-ups, you can do them on an incline or decline, similar to push-ups. You can also alter your arm position to adjust the difficulty of the movement. Keeping the arms by the sides is easier, while keeping both arms straight overhead, by the ears, is more difficult. Holding weight at the chest or overhead further increases the demands.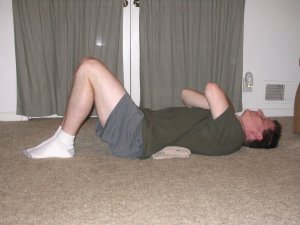
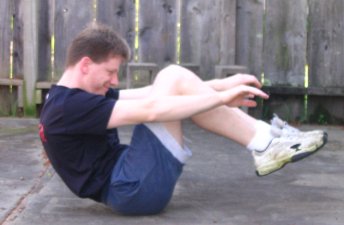
N-up
An N-up is a sit-up type movement in which the upper body and legs come together into a tuck. At the top point of this movement, you will be sitting, with only your butt touching the ground, knees to the chest, and torso upright.
V-up
A V-up is like an N-up except that the legs are kept straight throughout the motion and the arms are extended straight overhead throughout the movement. Aim to be fully extended at the bottom and completely compressed at the top, with chin to shins and fingers to toes.
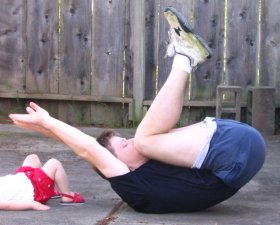
Tuck-up
Lie on your back and then lift your knees toward your chest aggressively so that you roll back into a tuck with your lower back off the floor.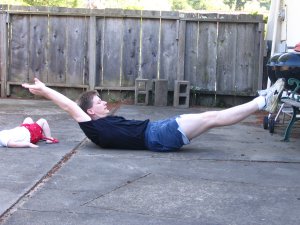
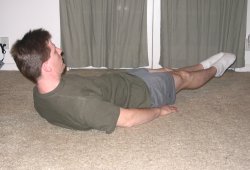
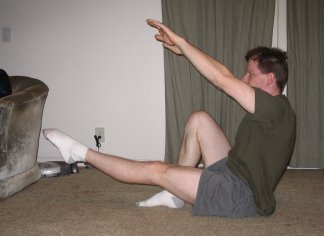
L-sit/V-sit
L-sits can be performed on the ground, with legs extended straight in front of you and hands flat on the floor on either side of the legs. This requires a conscious effort to push the shoulders down to lift the body high enough to perform the L on flat ground. You can also do a straddle L, with hands on the ground between your legs. Progressions to the L-sit are discussed in Parallette Training - Volume 1.
Hollow rock
The starting position is lying on the back in a hollow. A hollow position for this purpose is one in which the pelvis is turned under (i.e., tail tucked), legs are lifted slightly off the floor, lower back is touching the ground, head and shoulders are lifted slightly off the floor, and arms are held by the ears, off the ground. From this position, rock smoothly back and forth, keeping the body tight, the hip angle constant (no piking of the hip), and the lower back rounded. Any thumping in the motion shows that the hollow position has been compromised, which indicates that the trainee’s abs are not strong enough to keep the pelvis turned under in this position. Continued training will alleviate this deficiency.
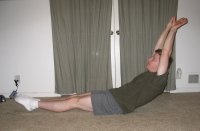
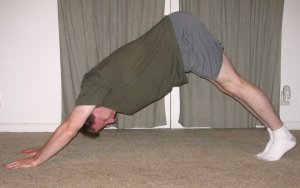
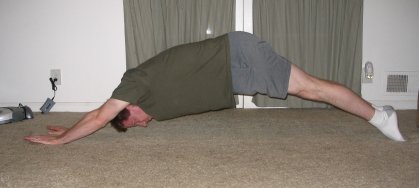
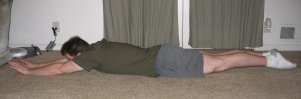
Hollow hold
Start in a push-up position. Then slide your hands forward until you are in an extended hollow position with just your hands and feet on the floor. When first starting this exercise, it is OK to pike significantly, keeping your butt high in the air. The key is to get the shoulders completely open. Once this position has been obtained, you can begin to extend your hips and approach an open hollow position. As you build strength in this position, point your toes so that you are supported on the top of your feet. A rolling device can be connected to the hands and/or feet to increase the demands and to allow for movement in and out of the position.
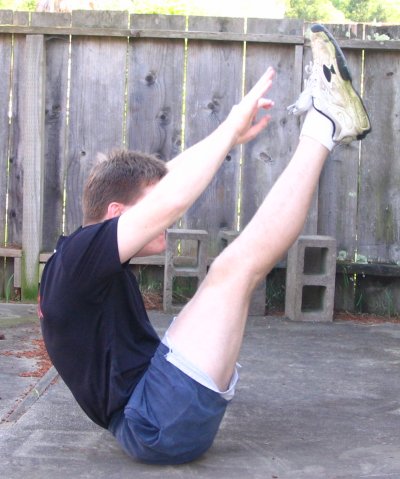
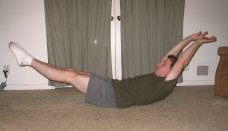
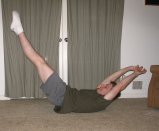
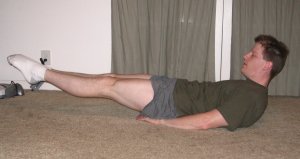
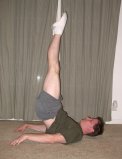
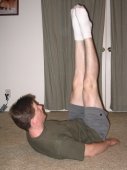
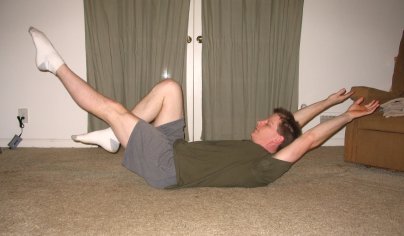
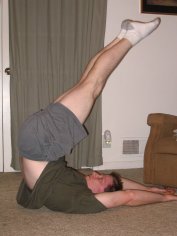
Advanced leg lift
Start by lying on your back with your legs straight. Place each hand on the floor, palm down, just under each respective gluteus. While keeping hollow and looking at your toes, lift your legs. Just before your legs reach vertical, extend your torso should to lift your lower back off the floor. The top point of this move is the position known as a "candlestick."
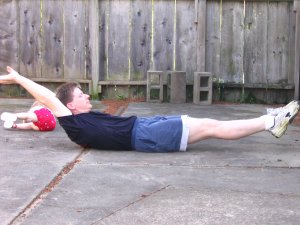
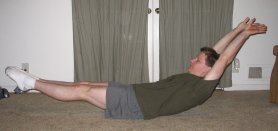
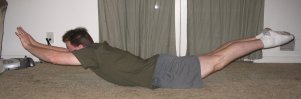
Arch-up
Start by lying on your stomach on the floor. Lift your legs and chest off the floor then return to a prone position. Make sure your heels are squeezed together throughout and your legs are kept straight, as this increases the demand of the movement.
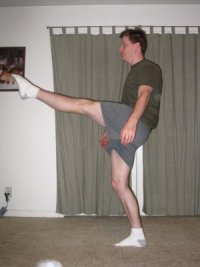
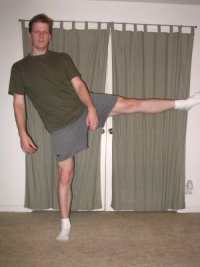
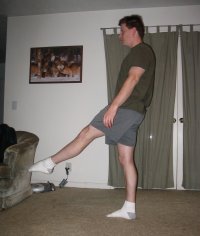
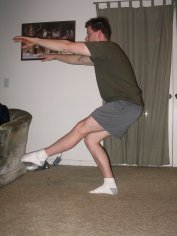
Standing leg lift
Hailing from ballet training, standing leg lifts strengthen hip muscles while increasing active ROM. Start standing, either holding onto a stable object or freestanding. Then lift one leg as high as you can (keeping base leg straight ... not like photo..). Keep the lift controlled and at a moderate pace so it is a lift, not a kick. Keep both legs straight the whole time, and the torso aligned. Do not lean in any direction. The leg lift can be performed to the front, to the back, and to the side.
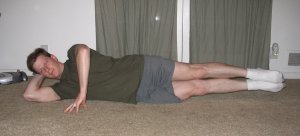
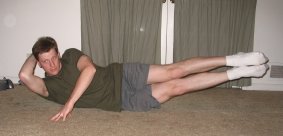
Side conditioning
Start by lying on your right side, using your left hand on the floor in front of you for balance. From this position, lift your legs and shoulders simultaneously and then return to the start position. Repeat on the left side.
Arch rock to hollow rock
Lie on your back in a hollow position, perform a few hollow rocks, and then roll sideways onto your stomach, without touching the ground with either your hands or your feet. Then perform a few arch rocks and roll, again without hands or feet touching the ground, back onto your back. This sequence can be repeated to cover distance, or back and forth in a small area.
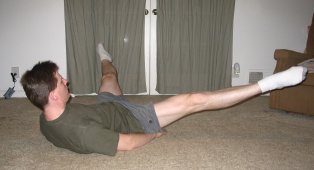
Leg lift straddle-down
Start on your back in a hollow and lift your legs to vertical, then straddle both legs out to the sides and swing them down to the start position. Then reverse the motion, straddling the legs in the hollow, bringing your legs up to vertical, and then lowering them, feet together, to the start position.
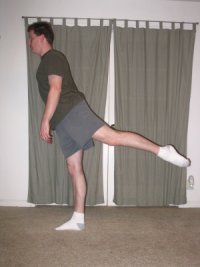
Rear leg lift
Start lying on your stomach. Lift one leg up the back as high as you can and return to the start position in a controlled movement. Legs should be kept straight throughout.

Hip adduction
Lie on your right side and lift your left leg as high as possible and return to start position. Keep both legs straight throughout. Repeat on left side.
Hip abduction
Lie on your right side with your right leg on the floor and extended in line with your body, and your left leg bent, with the left foot on the floor in front of your hips. Then lift your right leg as high as possible (inner thigh toward the ceiling) and return to the start position in a controlled movement.
Squats, jumps, and sprints
You can't be a CrossFitter for long without learning the fundamental importance of frequent, well-executed unweighted squats (detailed in CrossFit Journal issue 4). There are numerous no-equipment variations that build on that foundation.
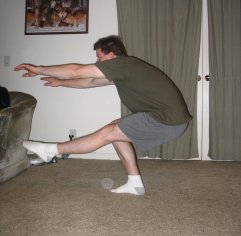
Pistol
A single-leg squat. While holding one leg out in front, perform a full squat with the other leg. This movement will be quite difficult and will require assistance for most people at first. Holding onto a stable object will allow you to perform the movement properly and gradually wean yourself of the support. A stretch band or stretch tubing can also be used for assistance. With the stretch band secured to an object overhead (such as a pull-up bar, for example), you can grab the band with one hand for stability and support. As you get stronger in this movement you can grab the band at a lower point to reduce the assistance or use a lighter-weight band. As with regular squats, pistols can be performed with a jump at the end, including a jump onto a raised surface.
Pistol roll
Starting from a stand on one leg, squat down, roll onto your back into a candlestick position (high on your shoulders with both feet pointed toward the ceiling), and then roll forward to single-leg stand again. The raised foot will never contact the ground. It is important to maintain proper squat technique as you squat and return to standing. Many people will try to lean forward over their foot and allow their heel to rise off the floor, which can lead to injury.
Squat jump
Perform a squat and then explode upward to jump as high as you can. This is a very aggressive, dynamic movement. This should be performed only by trainees who have a good bodyweight squat, since doing squat jumps improperly can be hard on the knees. Increase the challenge and motivation by jumping onto a raised object. The height of the object can be increased incrementally as your power improves.
Sequence jump
Bound across the ground in a series of two-footed jumps, making each jump as explosive as it can be and minimizing contact time with the ground. Think of punching through the ground with your legs. Actively anticipate the ground and start driving with your legs slightly before impact, so that you bounce immediately into the next jump. Objects or lines can be used to set targets or a course and to make the movement a challenge or competition. This exercise should not be performed on pavement because of the impact involved.
Short-distance sprints
Repeated short-distance sprints are an excellent training modality. The metabolic demands are high and the loads on the legs are limited only by the trainee’s motivation. Place two lines 12 to 30 meters (40 to 100 feet) apart. Sprint from one line to the other, rapidly changing direction at the line. To add variety, add another movement at each line, such as a push-up, v-up, or any other exercise.
General movements
Burpee
To do a burpee in its most basic form, start from standing, squat with your hands on the floor, and jump your feet back to put you in a prone position with straight arms (as at the top of a push-up). Then bring your legs forward into a squat again and return to standing. This basic version is also sometimes called a squat thrust. Several modifications can be made to the burpee to increase its demands: add a push-up in the prone position, add a jump at the end as you return to standing, perform the burpee under a bar and jump up to do a pull-up in each rep, etc. Be creative with burpees and see what variations you can come up with.
Jumping Jack
Most people have done jumping jacks in a PE class at some point. They are an excellent way to warm up, and they can be included in a conditioning set either as a station where fatigued muscles are allowed to recover while metabolic demands are kept high, or as a significant component of a metabolic conditioning circuit. Jumping jacks should be practiced both with arms and legs in concert (legs straddling while arms are swung upward) and in opposition (legs straddling while arms are brought down).
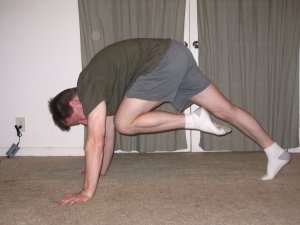
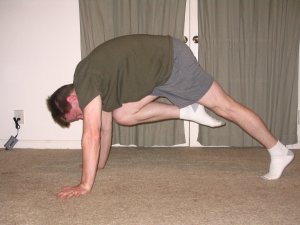
Mountain climbers
Start in a prone position with hands on the floor and arms straight, as if at the top of a push-up. Then pull each knee in to your chest in a rapid alternating pattern.
Handstand and press handstand
Handstand and press handstands are excellent exercises for developing strength and kinesthetic awareness. Technique and progressions are described in depth in CFJ issues 17 and 43.
By Roger Harrell.